As a lover of all things Disney, and style, Christmas is a great time of year to accessorize my home with DIY Disney inspired baubles. You can make these baubles alone, with your kids or with someone special as a fun Christmas date!
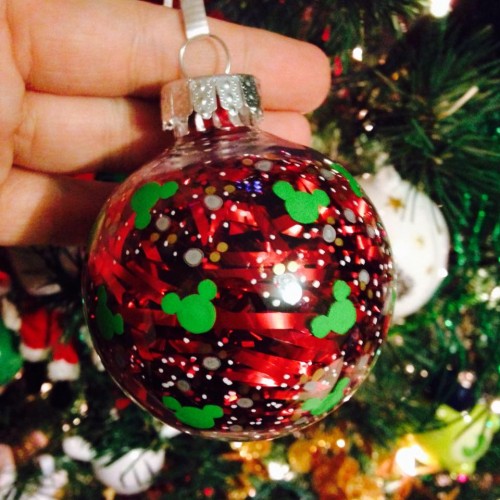
I love to cover my tree in Disney ornaments, and decorate my home with all of the adorable Disney Parks merchandise I can carry home from the parks. I also like to be a little different, so where all the stuff I can buy at stores and the parks is adorable and sparkly, I also like to have pieces that not everyone else has. This is when my DIY side comes out, and I have to create something that is different. I’ve created a few different varieties of ornaments this year, and my “Mickey Tinsel” has been the most popular. Another favorite has been the “Floating Mickey”, which looks complicated but is so easy once you gather all your supplies. Are you ready to come on a crafting journey with me?
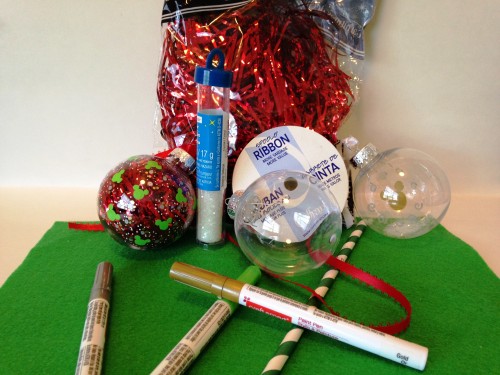
First thing first, you’ll need some clear ornaments that you can pick up at your local craft store, they come in plastic, or glass. Both are beautiful, so it’s really up to you which one you want to use, personally I use the plastic because I have 2 cats, soooo enough said.
You’ll also need:
- Tinsel (easily found at dollar stores).
- Paint Pens in your desired colors (Available at craft stores, and SO handy!).
- Ribbon (for hanging your ornaments).
- GLITTER!!! (Can I say that any louder? I think I can, GLITTER!!!!!!!!).
- Clear overhead transparency sheets, or vellum paper. (Found at office supply stores).
- Scissors (I didn’t grab those when I started… I regretted that action when I went to start tying ribbons).
- A straw or pen to help push the tinsel into the ornament.
- A Marker for tracing.
Now that we have everything, let’s make ourselves a Mickey Tinsel ornament!
Step 1: Make sure the ornament is wiped clear of dust, and grab your desired paint pen that you want to be the main color. I chose green because I have a traditional “Red, Green and Gold” theme going with my tree. Find a spot that is off center, and begin drawing your Mickey, start with a basic circle, and then add the smaller circles on the upper portion of the “head”. I like to paint my Mickeys in random areas around the front of the ornament, I leave the back of mine blank for personalizing, but you can feel free to repeat your Mickey pattern on the other side as well. I try to work in odd numbers, and randomly place them for a more organic feel.
Step 2: Once you are happy with the amount of “hidden Mickeys” it’s time to add a little sparkle! I make 3 gold dots in between all of the Mickeys, I then come back through and for each gold dot, I make 3 smaller dabs with my silver pen. This gives it the look of Pixie Dust, and I love Pixie Dust! Remember you can do as many dots and dabs as you want and in any metallic colors, this is your ornament so it’s all about your style.
Step 3: Now the FUN (not!) part! Stuffing the tinsel in. Tinsel is tricky and sneaky, and loves to find it’s way all over the house. Remove the cap and wire from your ornament first. Grab a small handful, and twist it up so that you can start sliding it into the ornament. Take your straw, pen or even a chop stick and use it to stuff the tinsel in. This may get annoying especially because it will try to pop back out every now and then. Now that the tinsel knows who’s the boss, you can place the cap and wire back on the ornament. Tie a piece of ribbon around it in the length that you want it to hang from the tree, and Voila!
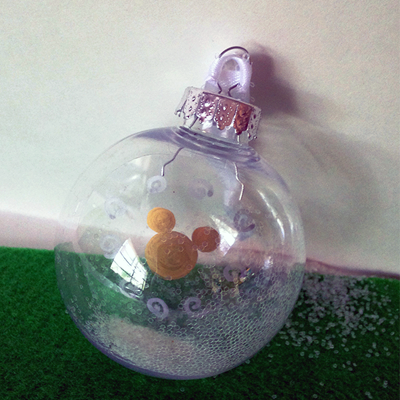
Now that we’ve had fun with our Tinsel Mickey ornament we can move on to the Floating Mickey! Make sure you have your clear paper handy and let’s go play!
Now with the floating ornaments you can go a couple of ways. The first is you can simply paint your Mickey or other desired design on the clear paper. Secondly you could print a design of your choice, or third you can use stickers of your favorite characters!
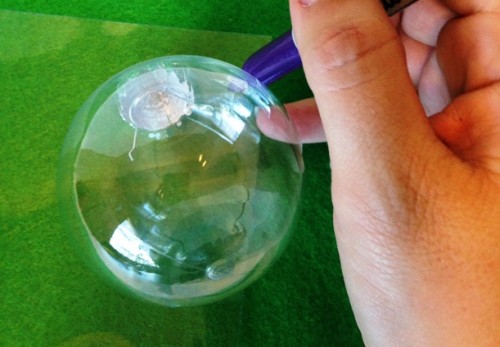
Step 1: Grab your paper, and make sure it is free from dust and debris, if you are printing an image you’ll want to do that before cutting the paper, if not grab your maker and lets get tracing! Lay the ornament on the clear paper, and trace around it with the marker.
Step 2: Now it’s time to cut, make sure you leave a notch at the top of the circle like shown in part 2 of the pictorial image. The notch should be skinny enough to fit in the top area of the ornament that the cap fits on, and tall enough so it doesn’t slip through. This will keep your “floating image” upright. Your cuts don’t have to be perfect, since the paper is clear any small imperfections will be invisible.
Step 3: It’s image time! At this step if you didn’t print an image that you cut out, you can paint a Mickey or other fun design with your paint pens, or add a cute sticker. I like to use the metallic and holographic stickers for these. It doesn’t even have to be perfectly straight or centered, because it’s going to have the illusion of floating inside the ornament.
Step 4: Let’s take that cap and wire off, and make our image float! Gently roll your circle up, leaving the notch on the top, and insert the piece of paper bottom first into the ornament. The circle should unfurl once inside and the notch should hold it straight. You can use the notch to adjust the circle inside the ornament to your liking.
Step 5: This is my favorite part, it’s time to add the GLITTER!!!! I don’t mind glitter covering my house so I just pour the tube straight in, if you want to be careful you can use a funnel, or rolled up piece of paper. About a tablespoon of glitter is enough to give the bottom some sparkle, and sift around the ornament nicely. Now just pop back on the cap, and slip in the wire being careful to slide the wire behind the notch so it doesn’t push your image back. Tie on your ribbon and Voila times two!
I really love the illusion aspect of this one. It also reminds me of snow globes, and that was one of my favorite things to collect as a little girl!
I hope you enjoyed these tutorials and please share with us your DIY ornaments if, and when you make them! Are there any other DIY Disney projects you would like me to tackle? Let me know in the comment section below!
Disclaimer - As an Amazon Associate, I earn from qualifying purchases.Thank you for visiting the Disney Fashionista website. Be sure to sign up for our Daily Newsletter where we deliver the best in Disney Fashion, Travel, Makeup and More to your inbox! You can find us all over the internet at Twitter, Facebook, Instagram, and even Pinterest!
- Minnie and Daisy Celebrate Friendship On A Second Lilly Pulitzer Print! - November 15, 2024
- Fall Is In Full Swing In The October Fairytale Fashion Fix Boxes - November 14, 2024
- Mickey’s Very Merry Christmas Party 2024 Merchandise Is A Flurry of Fun! - November 8, 2024





I might try making these this year.